How To Compost At Home: A Beginner’s Journey to Sustainable Gardening
Welcome to my personal journey into composting at home. If you’ve been hunting for straightforward, no-nonsense instructions on turning your kitchen scraps and yard waste into nutrient-dense compost, you’ve landed in the right place. I’m excited to share real-world insights, practical steps, and the careful balance needed to transform everyday waste into gardening gold. This comprehensive guide dives deep into every aspect of home composting—from setting up your first pile to monitoring its progress, complete with a case study and some numbers you can bank on.
Understanding the Fundamentals of Composting at Home
At its core, composting is nature’s way of recycling—an elegant process where organic materials break down into a rich, dark soil amendment that nourishes your garden. When I started out, I quickly realized that composting isn’t just a task; it’s an ongoing conversation with nature. The more you understand the rhythm of decomposition, the easier it becomes to create an efficient system that works for you.
The Four Cornerstones of Successful Composting
- Green Materials: Think of these as your nitrogen boosters. They include fruit and vegetable scraps, coffee grounds, and fresh grass clippings.
- Brown Materials: These provide the essential carbon component. Examples are dried leaves, shredded cardboard, paper, and straw. They help maintain the balance and ensure your pile doesn’t get too wet.
- Air: Oxygen fuels the aerobic bacteria responsible for the decomposition process. A well-aerated system is key to an efficient compost pile.
- Moisture: Your compost should resemble a damp sponge. Too dry, and the process slows; too wet, and you risk odor and pest issues.
Combining these components in the right ratios is what sets the foundation for a thriving compost pile. Over time, I learned that a little attention to these details makes all the difference.
How To Compost At Home: Choosing Your Ideal Compost Bin
One of the first steps on my composting journey was selecting the perfect bin. Your choice largely depends on the space you have available and your personal preferences. Here are several options to consider:
Different Composting Bin Options
- Store-Bought Bins: These are often designed for optimal aeration and drainage. For newcomers, they offer a straightforward solution with fewer complications.
- DIY Composters: If you’re inclined towards DIY projects, consider repurposing wood pallets, wire mesh, or even a modified large trash can with drilled holes.
- Open Compost Piles: When you have ample yard space, creating a simple, open compost pile is both effective and flexible.
Regardless of the option you choose, ensure your bin is well-aerated and can adequately manage moisture. Proper aeration and drainage prevent foul odors and keep your microbes busy. Also, while you’re on your sustainable journey, don’t forget to check out other eco-friendly resources, such as the tips on Eco Friendly Cleaning by Eco Casa Life.
How To Compost At Home: Crafting Your Compost Pile Step by Step
Once your bin is ready, it’s time to start building your compost pile—a process that, although simple, requires patience and regular maintenance. In my early days, layering my materials carefully made all the difference to the pace and quality of the compost.
Step-by-Step Guide to Layering Your Compost Pile
- Build Your Base: Begin with a foundation of coarse brown materials like dried leaves or small twigs. This creates air pockets and aids in proper drainage.
- Alternate Layers: Overlay your base with green materials, then add another layer of browns. I always aim for a 2:1 ratio of browns to greens. This method minimizes odors and encourages balanced decomposition.
- Adjust Moisture Levels: As you construct your pile, lightly sprinkle water. Your pile should mimic a wrung-out sponge. If it’s too wet, incorporate more browns; if too dry, add extra greens or a light misting of water.
- Turn Regularly: Every 2 to 4 weeks, mix your pile with a pitchfork or small shovel to introduce oxygen. Aeration is crucial to support the active bacteria that speed up decomposition.
This methodical layering isn’t magic—it’s simply following nature’s blueprint. Over time, you’ll begin to notice that a properly maintained pile transforms into nutrient-rich “black gold” that enhances your garden’s vitality.
What to Compost and What to Avoid
One of the key lessons I learned on this journey is knowing what belongs in your compost pile. Not all materials break down effectively, and some can invite unwanted pests. Here’s a cheat sheet on what to include and what should be skipped:
Items That Belong in Your Compost Pile
- Fruit and vegetable scraps
- Coffee grounds (and the filters)
- Eggshells (crushed for faster decomposition)
- Dried leaves
- Grass clippings
- Non-glossy paper and cardboard
Caution: Items to Leave Out
- Meat, dairy, and oily foods – these tend to attract pests and produce unpleasant odors
- Padded envelopes or plastic bags
- Weeds that have already produced seeds
- Pet waste
By sticking to these guidelines, I’ve managed to avoid many early frustrations and ensure that my compost remains a valuable asset for my garden, rather than a source of recurring headaches.
Monitoring Your Compost: How To Keep the Process On Track
As with any natural process, composting requires careful monitoring. I’ve discovered that checking key factors like moisture, temperature, and overall decomposition is critical to success.
Key Indicators of a Healthy Compost Pile
- Moisture: A healthy pile feels like a wrung-out sponge. Adjust by adding water or extra brown materials.
- Temperature: A vibrant compost pile typically heats up between 130°F and 160°F. If it cools too much, turning it can reinvigorate the process.
- Decomposition: Over time, you should see a decrease in volume, a shift from chunky material to a fine crumbly texture, and an earthy aroma replacing any strong smells.
Keeping an eye on these elements allows you to intervene if something goes awry and keeps the process humming along nicely.
The Problem: Excess Waste and Environmental Impact
With overflowing landfills and the environmental damage caused by decomposing organic waste releasing methane, the problems inherent in current waste management practices became all too clear to me. Every discarded apple core and wilted lettuce leaf contributes to a larger environmental challenge, one that demands a practical, sustainable solution.
Environmental Impact and the Waste Dilemma
- Landfill Overflow: Organic waste in landfills often leads to methane production—a potent greenhouse gas that intensifies climate change.
- Resource Waste: Throwing away food scraps isn’t just bad for the environment; it wastes valuable resources that could be repurposed to enrich our soil and support sustainable food production.
- Ecosystem Disruption: Over-reliance on chemical fertilizers for soil enrichment further disrupts local ecosystems, reducing biodiversity and harming beneficial microorganisms.
This is why I made the choice to reduce my contribution to landfill waste by reclaiming and transforming kitchen scraps through composting.
The Sustainable Solution: How To Compost At Home Effectively
Composting at home is a straightforward solution with significant environmental benefits. My approach is based on balancing natural materials while effectively managing moisture and aeration. Let’s break down the process into manageable, actionable steps.
Step 1: Gather Your Materials
- Green Materials: Collect your kitchen waste such as fruit and vegetable peels, coffee grounds, and eggshells.
- Brown Materials: Harvest dried leaves, shredded paper, cardboard, and straw.
- Additional Essentials: Don’t forget to maintain proper moisture and air – two indispensable elements to keep your pile thriving.
Step 2: Set Up Your Composting Area
- Select a Suitable Location: Whether it’s a small corner of your balcony or a dedicated outdoor space, ensure your compost bin is easily accessible.
- Choose the Right Bin: Pick between a store-bought, DIY, or open pile system based on your space and comfort level.
Step 3: Lay the Foundation and Start Layering
I learned early on that the secret is in the layering process. Start with a base of coarse browns, then alternate with greens. Consistency and balance are essential.
- Mix in a 2:1 Ratio: I typically add two parts browns to one part greens. This ratio helps reduce odor and ensures the pile doesn’t become overly wet.
- Adjust Frequently: As you build the pile, lightly sprinkle water. Remember, the aim is a damp (not saturated) pile resembling a wrung-out sponge.
Step 4: Maintain and Monitor
- Turn Regularly: I turn my compost every 2 to 4 weeks to promote aeration. This simple step reinvigorates microbial activity and speeds up decomposition.
- Check for Signs of Trouble: Always be on the lookout for imbalances in moisture or noticeable odors. Adjust by adding the necessary materials—more browns if too wet, or a bit of water and greens if too dry.
This structured approach has not only simplified my composting process but has also reinforced a sustainable lifestyle that naturally supports my garden’s health.
The Financial Impact: Composting Benefits Beyond Environmental Gains
One of the surprising outcomes of adopting a composting lifestyle is the financial benefit it brings. Instead of spending money on chemical fertilizers or unnecessary waste disposal bills, I reduced my expenses while enriching my garden naturally.
By the Numbers: Composting Savings
- Reduced Waste Disposal Costs: With less waste going to landfills, savings on waste management fees can be significant over time.
- Fertilizer Cost Savings: Homemade compost replaces commercial fertilizers. In my case, I estimate a savings of 30% to 40% on annual garden care expenses.
- Energy and Resource Efficiency: Compost-enriched soil retains water better. This reduces the need for frequent watering and, in turn, lowers water bills. An efficient garden not only thrives but also contributes to a reduced carbon footprint.
Case Study: My Installation Diary
When I first attempted to compost in my modest backyard, I faced common challenges: an imbalance between green and brown materials resulted in a wet, smelly pile. I learned fast—too many greens invite odor, too many browns slow the process. I made adjustments:
- I started with a base of coarse brown materials like dry leaves and small twigs to create natural air pockets.
- Next, I carefully layered kitchen scraps and coffee grounds on top, always ensuring the balance was about 2:1 for browns to greens.
- Every few weeks, I turned the pile. Initially, I was nervous about messing it up, but the results spoke for themselves. The pile heated up to around 150°F, indicating active decomposition, and eventually cooled to a rich, dark texture that closely resembled “black gold.”
This real-life experiment turned my garden around—not only did I save money on fertilizers, but I also reduced waste, making the entire process feel like a win for both my wallet and the planet.
The Financial Impact: Quantifying Your Compost Success
By the Numbers: Detailed Impact of Home Composting
- Initial Investment: DIY compost bins can be set up for under $50, while even store-bought bins rarely exceed $100 for a beginner-friendly model.
- Monthly Savings: Depending on local waste disposal fees and fertilizer costs, many users report saving between $10 and $30 a month.
- Carbon Footprint Reduction: Composting reduces methane emissions—a composting system can potentially cut household carbon emissions by a noticeable margin, contributing to overall sustainability.
Sustainability Disclaimer
Please note that composting regulations may vary depending on your local government policies. It is essential to ensure that your compost setup complies with local guidelines, particularly in urban areas. Always check with your local regulatory authorities if you’re uncertain about any legal considerations or permitted practices.
How To Compost At Home: Tips, Tricks, and Frequently Asked Questions
Some Practical Tips for Consistent Success
- Keep It Simple: Start with a small, manageable compost bin. Even a few scraps a day can build momentum.
- Be Consistent: Regularly add materials and turn your pile. Consistency is key in maintaining active decomposition.
- Document Your Progress: I keep a small journal, noting the types of materials added, temperature shifts, and changes in texture. This documentation helped me troubleshoot and adjust my process over time.
- Experiment to Learn: Don’t be afraid to tweak the ratio of greens to browns. Small modifications can lead to big differences in the speed and quality of the compost.
Frequently Asked Questions
What is the ideal ratio of brown to green materials?
I recommend about two parts brown materials to one part green. This balance helps prevent excess moisture and reduces odors while encouraging efficient decomposition.
How often should I turn my compost pile?
Every 2 to 4 weeks is sufficient for introducing oxygen. I’ve found this frequency to keep the microbial activity robust and the process consistent.
How do I know when my compost is ready?
Your compost is ready when it transforms into a dark, crumbly material with a pleasant, earthy smell. If you still see large, recognizable scraps or if there is any sour odor, give it a bit more time and continue mixing.
My compost pile smells bad—what should I do?
An unpleasant odor often indicates too much moisture or an imbalance in your materials. Add dry, brown content, turn the pile to improve aeration, and the smell should subside.
Can I compost in an apartment?
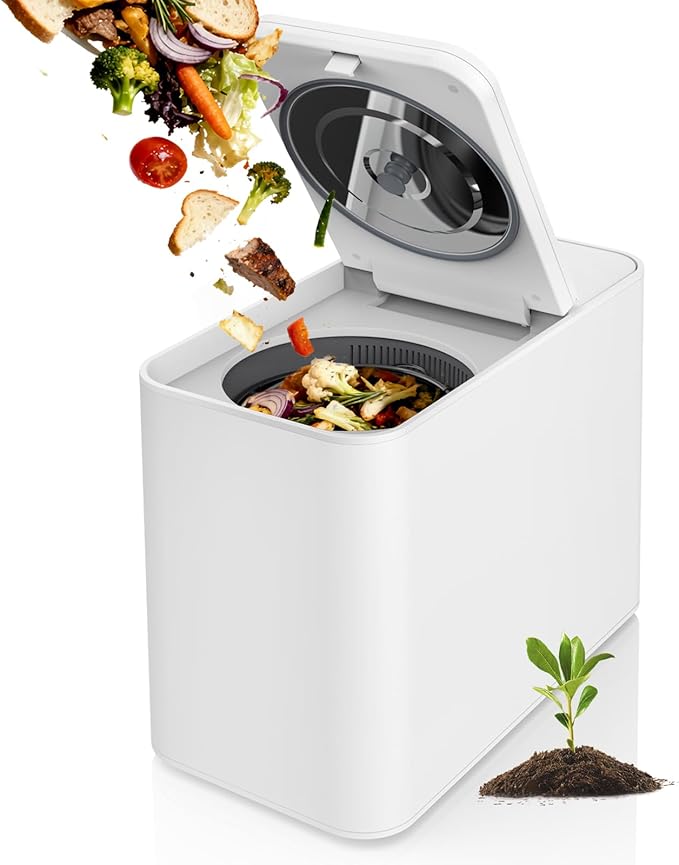
Absolutely. A small compost bin on a balcony or even an indoor container can work well. Just be mindful of odor and moisture control. There are many compact composting systems designed for limited spaces.
How To Compost At Home: Embracing a Sustainable Lifestyle Change
My journey with composting has grown beyond just a method of managing waste—it’s become a reflection of my commitment to sustainable living. Every piece of fruit peel or delicate twig I add is a reminder that even small, individual actions contribute to a larger environmental change. It reminds me that sustainability isn’t a destination but a continuous process of learning, adapting, and thriving in tandem with nature.
Engaging Family and Friends
- Teach Through Example: I involve my kids in simple tasks like sorting scraps and turning the compost pile. This not only makes the process fun but also instills a habit of eco-responsibility.
- Share Your Success: I regularly share progress updates and success stories on social media and the Eco Casa Life blog. It creates a ripple effect in my community, inspiring others to join the sustainable movement.
- Keep It Relatable: Composting isn’t about perfection. It’s about learning from mistakes, adjusting along the way, and celebrating small wins—like that first time your garden truly thrives because of your handmade compost.
How To Compost At Home: Final Thoughts on Sustainable Gardening
Ultimately, composting at home is about taking responsibility and making deliberate choices that benefit both your garden and the planet. I’ve experienced firsthand how transforming waste into a resource reduces environmental impact and cuts down on unnecessary expenses. More importantly, it creates a personal connection with the natural cycle of growth and renewal.
This guide is not just a how-to manual—it’s part of a much larger narrative of sustainable living. Every time you add a scrap to your compost pile, you’re not only investing in healthier soil and flourishing plants; you’re also taking a stand against wasteful practices and excessive reliance on chemical fertilizers.
In Summary
- Start small and build steadily: Whether you choose a store-bought bin or a DIY solution, the key is to keep the process manageable and consistent.
- Monitor and adjust: Regularly check moisture, temperature, and decomposition progress to guide your interventions.
- Celebrate the journey: Composting is an ongoing experiment that rewards patience and persistence with tangible improvements in your garden.
My Journey in Numbers and Facts
By the Numbers: A Quick Breakdown
- Setup Cost: $30–$100 for a beginner-friendly compost bin or DIY setup.
- Monthly Savings: Estimated at $10–$30 by reducing reliance on commercial fertilizers.
- Water Efficiency: Compost-enriched soil can reduce watering frequency by up to 20%, translating into lower utility bills.
- Carbon Footprint: By composting, one household can potentially cut methane emissions significantly, contributing to cleaner air.
Closing Thoughts: A Continuous Sustainable Journey
Composting at home is more than just a gardening method—it’s a lifestyle choice that reinforces the interconnectedness of our actions and their impact on the environment. From reducing landfill waste to saving money on fertilizers, the benefits are clear and wide-ranging. I encourage anyone interested in sustainable gardening to give it a try. If you’re looking for more eco-friendly ideas, be sure to explore resources on Eco Friendly Cleaning for additional tips on living sustainably.
Remember, the journey to sustainable living is built one small step at a time. By choosing to compost at home, you’re joining a community of like-minded individuals who believe in making every action count. Here’s to turning everyday waste into opportunities for growth and enriching not only our gardens but also the environment we all share.